
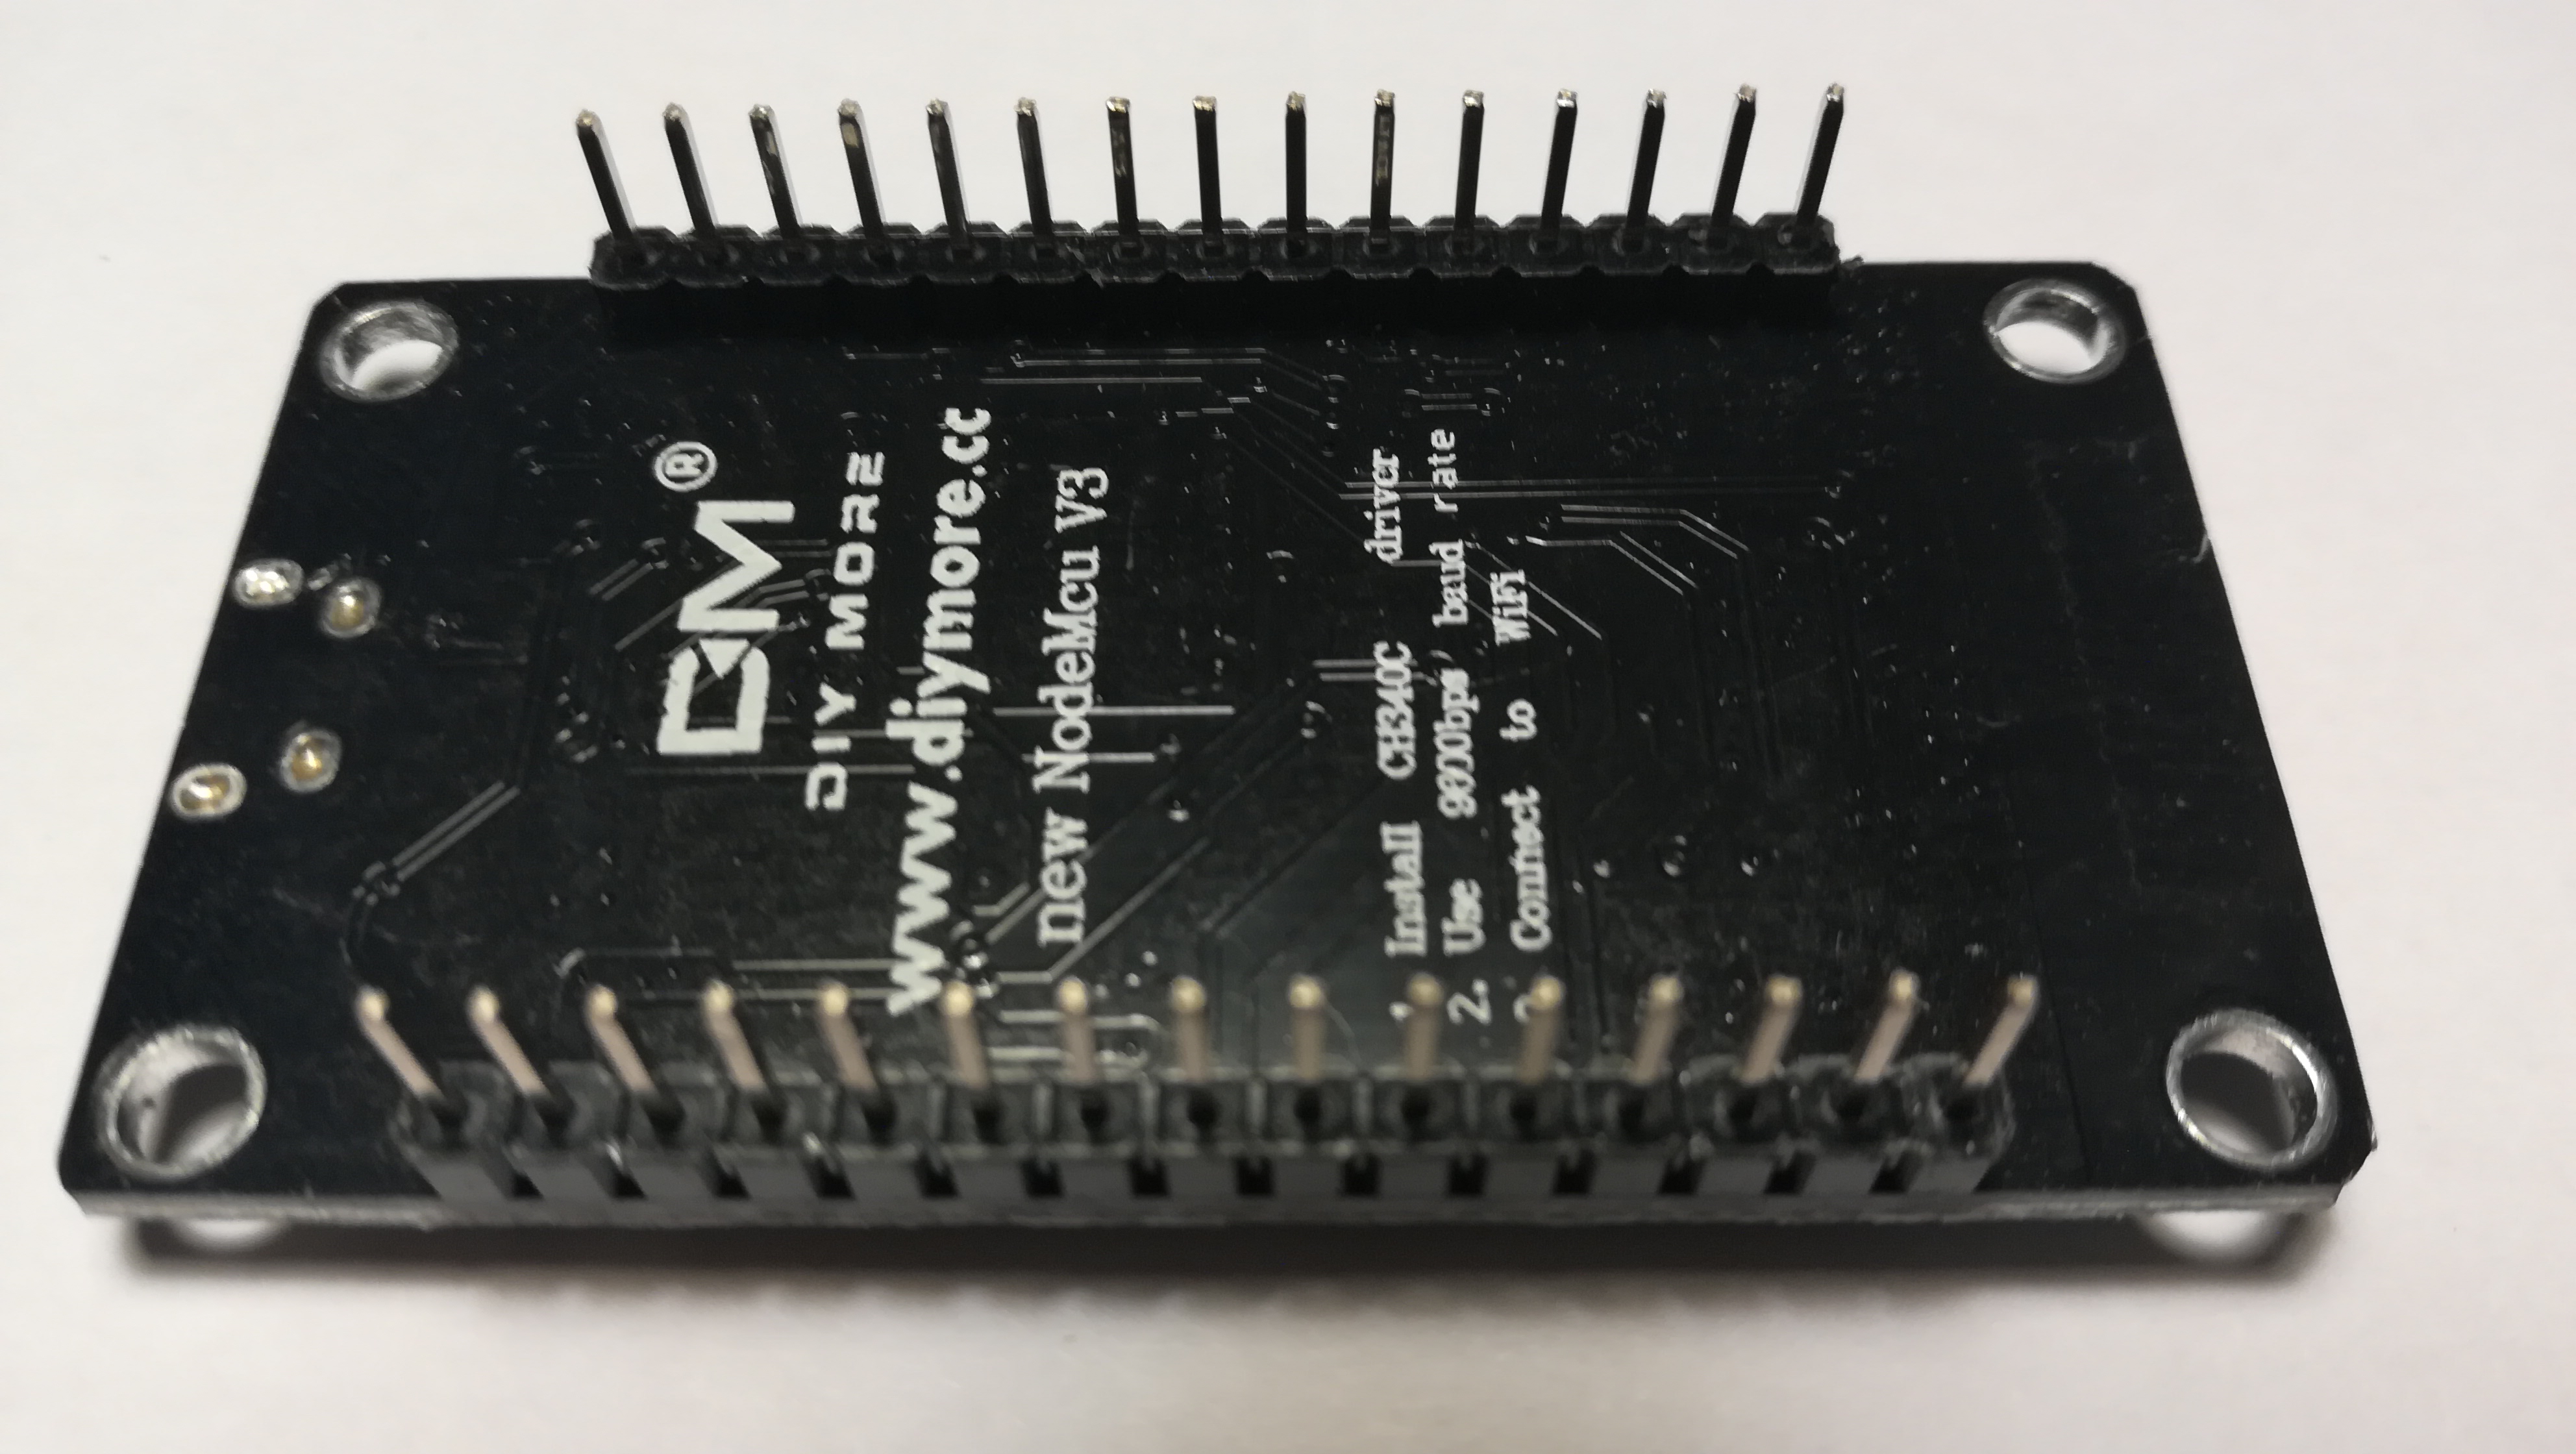
Esta placa de desenvolvimento trabalha a 3.3V e é baseada no ESP8266.
Especificações
- Microcontrolador: ESP-8266MOD (ESP-12E)
- Voltagem: 3.3V
- Pinos Digitais I/O: 11
- Analog Input Pins 1
- Clock Speed 80MHz/160MHz
- Flash 4M bytes
- Tamanho: 68.6mm x 53.4mm
- Peso: 25g
Instalar a board (nodeMCU – ESP8266MOD) no Arduino IDE
Este passo só é necessário se não estiver já instalado o pacote para as placas ESP8266 no Arduino IDE.
- File > Preferences
- Em Additional Board Manager URLs, inserir:
http://arduino.esp8266.com/versions/2.3.0/package_esp8266com_index.json
- Em Additional Board Manager URLs, inserir:
- Tools > Board > Boards Manager
Instalar: esp8266 by ESP8266 community
Usar a board (nodeMCU – ESP8266MOD) no Arduino IDE
Escolher Board e Respectiva configuração
- Tools >
- Board: nodeMCU 1.0 (ESP-12E Module)
- CPU frequency: 80
- Upload Speed: 115200
- Flash Size: 4M 3M SPIFFS
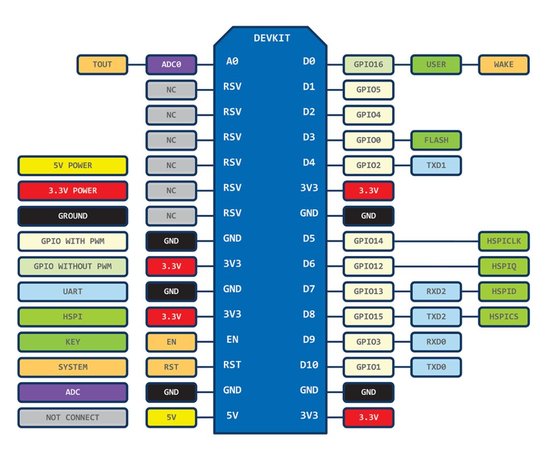
Pinout
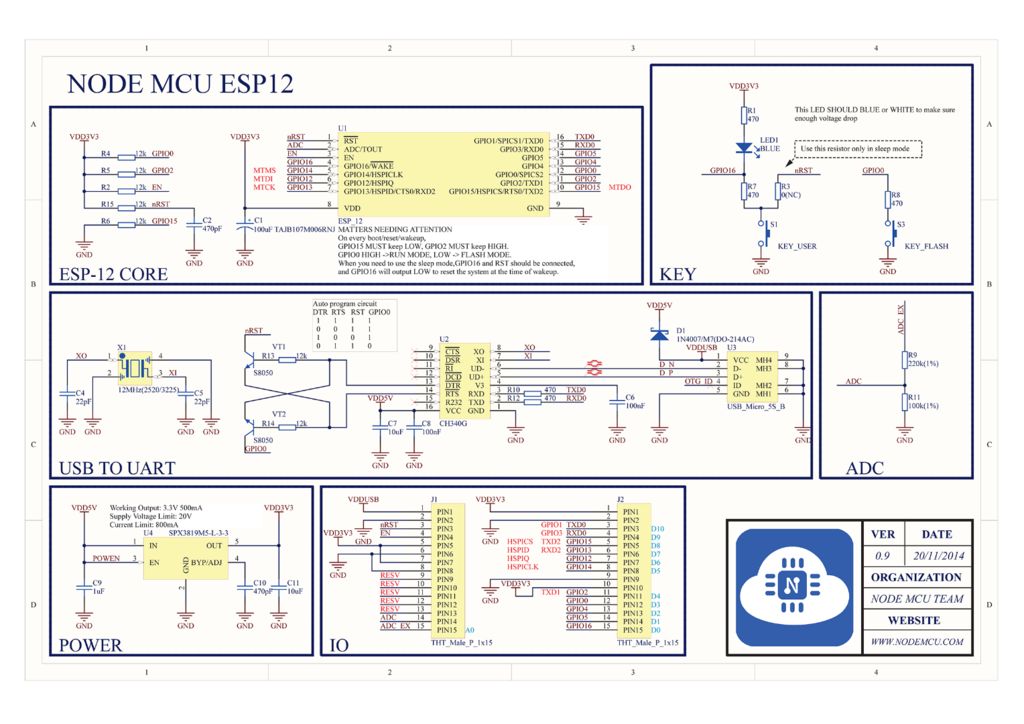
Outros diagramas
Testes básicos e exemplos,
Existem vários exemplos no menu: File > Examples > nodeMCU – ESP8266MOD.
- Teste básico com texto: ESP8266 > blink
+ INFO sobre o modulo
Benefits of using esp-host
- extremely low cost hardware , available worldwide
- ability to run 24/7 via usb, self-hosted payloads, no external apps or programs required.
- includes stable payloads, no memory errors or reloading pages.
- completely block all updates
- no need for custom dns server or settings, features automatic redirect
- easy to program and update via usb
- very low power consumption
You can download the payloads from the developer’s github here.
On the same page, the developer gives details on how to flash the payload into the ESP8266, reproduced below:
Requirements:
-esptool.py https://github.com/espressif/esptool
-ESP8266 Module with at least 4M flash
-Firmware 4.55 or 4.05
-esphost.bin or esphostmulti.bin or esphostmulti405.bin
Payloads included in esphost.bin
-VORTEX HEN 1.4
Payloads included in esphostmulti.bin
– HEN (stable)
– HEN+VR (stable)
– FTP (stable)
– DUMPER (stable)
– BACKUP (stable)
https://github.com/pearlxcore/ps4-playground-455
Instructions:
Flash esp host using the following command:
sudo esptool.py –port /dev/ttyUSB0 write_flash 0x00000 ./esphostmulti.bin
-after flashing completes, connect to “PS4-WIFI” using “easy setting” then go to [Settings] > [User Guide]
-NOTE: windows users must use the appropriate com port when flashing with esptool.py
-NOTE2: users can optionally flash using the GUI version of esptool https://github.com/Rodmg/esptool-gui
Original seller info (above)
https://www.modchipcentral.com/store/product.php?productid=18172
Links
https://github.com/esp8266
http://nodemcu.com/index_en.html
https://nodemcu.readthedocs.org/en/dev/